I like to send money in my cards to the Grandkids... LOL, encourages them to call me! I've started folding the bills into Origami that is specific to the person. This one is a guitar because my granddaughter plays lead guitar in a band - I find videos on YouTube with tutorials on how to fold them. I used an image [sent as a gift by my dear Canadian friend, Corina. No source info available.] that appears to have her hand extended to hold the instrument.
The A2 Z-fold card base was decorated with scraps of DP from my stash to meet the optional twist of this challenge.
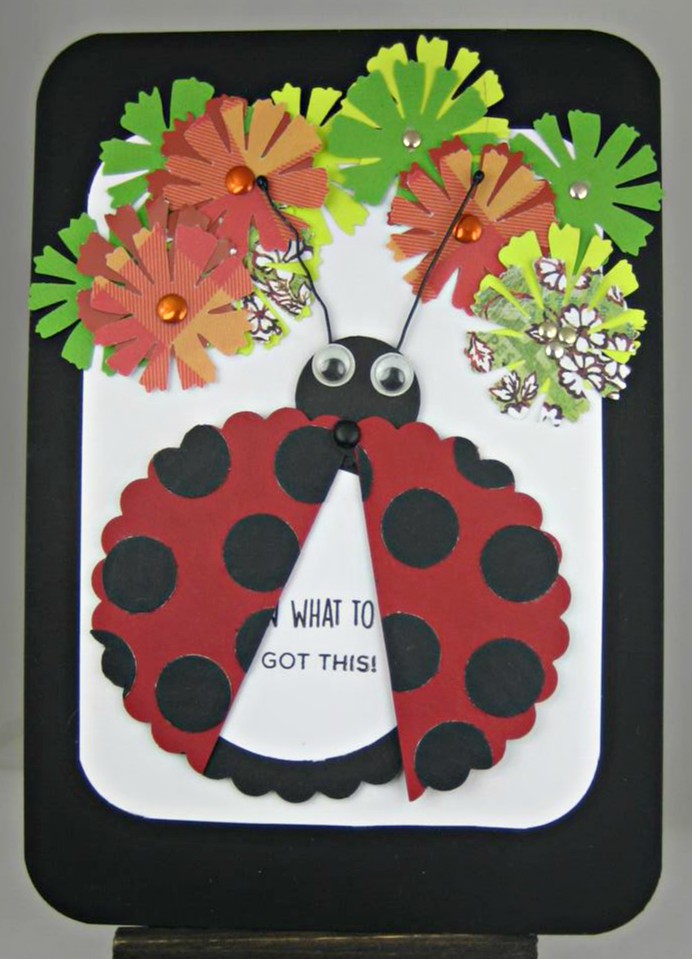
Create wildly and color with abandon!
~ginny
CHALLENGES:
Gem of a Challenge - #21 – ATG Always
Through the Craft Room Door - ATG Always
Crafty Sentiments – Fancy Folds TOP 3
Penny's Challenge #454 – ATG Always
Simon Says Stamp Wed - ATG
AYLI: As You Like It – Fave DP & Why [I am drawn to Primary Colors & Bold designs - if I need something subtle I tend to make my own background so the color is spot on and the design is non-descriptive]
Sweet Stampin' - Celebrations
Catch the Bug - Bugaboo – ATG
Aud Sentiments - #238 – ATG + Sentiment
Crafty Creations - #401 – ATG Always
Crafty Hazelnut's DP Challenge – Always ATG
Lil Patch of Crafty Friends - #117 – ATG Always